Step-by-Step: Replace Moen Bath Faucet Cartridge
Are you tired of a leaky Moen bathroom faucet that keeps you up at night? It might be time to replace the worn-out cartridge. This guide walks you through the process, ensuring a precise, leak-free fix. With the right tools and a systematic approach, you'll have your bathroom back in working order in no time. Let's dive in.
The Moen faucet cartridge might seem like a complex component, but replacing it is surprisingly DIY-friendly. With some basic plumbing skills and the right parts, you can complete this task and save on professional repair costs. Here's how to approach replacing your Moen bath faucet cartridge like a pro.
Understanding Your Moen Faucet Cartridge
Before diving into the replacement process, it's crucial to understand the Moen cartridge and its role in your faucet. Moen cartridges are robust, durable, and designed for smooth operation and longevity. However, they can wear out or malfunction over time, leading to leaks or poor water flow.


The cartridge is the heart of your Moen faucet, controlling both water flow and temperature. It connects to the faucet handle, allowing you to turn the water on and off, as well as mix hot and cold water. By replacing the damaged cartridge, you'll restore your faucet's original functionality and put an end to those irritating leaks.
Identifying Your Moen Faucet Cartridge
Before you start disassembling your faucet, you'll need to determine which type of Moen cartridge you have. Moen offers a variety of cartridges, including the Moen 1225, 1186, and 1056 models. Restoring your faucet to its original glory requires replacing it with the correct cartridge.
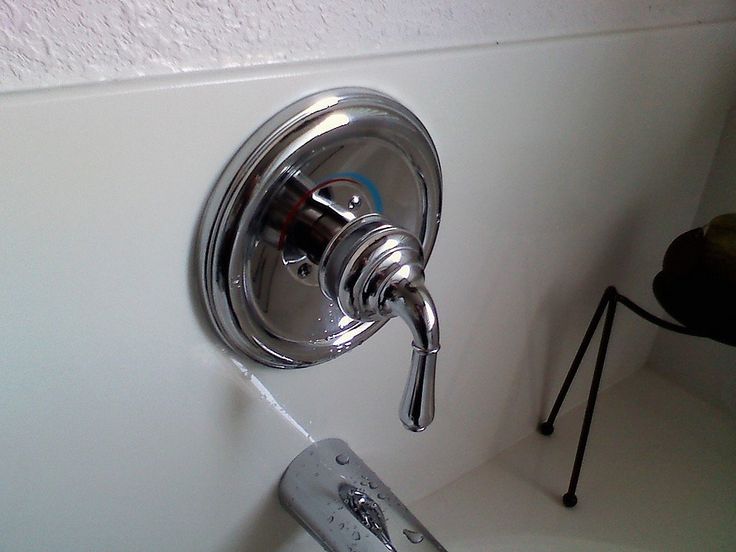

Moen provides detailed diagrams and part numbers on their website to help you identify your cartridge. You can also use your Moen faucet model number, serial number, or date code to locate the appropriate replacement part. Once you've identified your cartridge, purchase a new one, along with any necessary tools, to begin the replacement process.
Gathering Your Tools
Before you begin, ensure you have all the necessary tools to complete the task. A well-stocked toolbox will make the job easier and ensure a smooth, efficient process. Some essential tools for this project include:
- Adjustable wrench
- Replacement Moen cartridge
- socket wrench (for Moen 1225 cartridges)
- Small flathead screwdriver
- Drip bucket or cloth
- Plumber's grease
Preparing Your Bathroom for the Replacement
Once you've gathered your tools and identified the correct cartridge, it's time to prepare your bathroom for the replacement. This step ensures a clean, organized work environment and minimizes water damage. Follow these steps to set up your workspace:
Turn off the water supply to your faucet. Locate the shut-off valves under your sink or behind the access panel and turn them clockwise to close the water supply. If you can't find the shut-off valves, turn off the main water supply to your home as a precaution.
Open your faucet to relieve the remaining water pressure. Flush the system by turning the faucet handles on and off several times to release any trapped water. Place a drip bucket or cloth under the faucet spout to catch any residual water drips.
Disconnecting the Faucet Handles
With the water supply shut off and the water pressure relieved, it's time to remove the faucet handles. This step exposes the inner workings of the faucet and provides access to the worn-out cartridge. Follow these steps to disconnect the handles:
- Inspect the faucet handles to determine if they are set-screw or from-the-back handles. Moen offers both types, so understanding the handle type is crucial for proper removal.
- For set-screw handles, use a small flathead screwdriver to remove the screw located beneath the handle's lever. Unscrew the cap covering the set screw, then back out the set screw using the screwdriver. Once the set screw is removed, lift off the handle.
- For from-the-back handles, locate the handle mounting screws hidden behind the handle. These screws are usually accessed through a small panel or cover on the underside of the faucet deck. Remove the panel or cover, expose the mounting screws, and remove them using a screwdriver. Once the screws are removed, lift off the handle.
After removing the faucet handles, set them aside in a safe place. You'll need them later during the reinstallation process.
Removing the Old Cartridge
With the faucet handles removed, you'll have direct access to the cartridge. Removing the old cartridge involves disconnecting it from the faucet housing and extracting it from the faucet body. Follow these steps to remove the damaged cartridge:
Inspect the cartridge and determine if it is secured by a nut (Moen 1186 cartridges) or a threaded fitting (Moen 1225 cartridges). Depending on the type of cartridge, you'll use an adjustable wrench or a socket wrench to remove the cartridge.
For Moen 1186 cartridges, secure an adjustable wrench around the nut connecting the cartridge to the faucet housing. Grip the wrench firmly and turn it counterclockwise to loosen and remove the nut. Once the nut is removed, lift the cartridge out of the faucet body.
For Moen 1225 cartridges, identify the threaded fitting securing the cartridge to the faucet housing. Using a socket wrench, loosen and remove the fitting by turning it counterclockwise. Once the fitting is removed, pull the cartridge out of the faucet body.
If you encounter resistance while removing the cartridge, be patient and apply steady pressure. Do not force the cartridge, as doing so could damage the faucet or cause injury. If the cartridge is severely corroded or stuck, you may need to use a penetrating lubricant to help loosen it.
Installing the New Moen Faucet Cartridge
With the old cartridge removed, it's time to install the new Moen faucet cartridge. A correctly installed cartridge ensures smooth operation and prevents leaks. Follow these steps to replace the cartridge:
Prepare the New Cartridge
Inspect the new cartridge and ensure it matches the make and model of your original cartridge. Moen offers universal cartridges that can fit multiple faucet models, but using the correct cartridge for your faucet ensures optimal performance and longevity.
Before installing the new cartridge, apply a small amount of plumber's grease to the cartridge's O-rings. The grease provides a seal between the cartridge and the faucet housing, preventing leaks and ensuring smooth operation. Apply a thin layer of grease to the O-rings, ensuring even coverage.
Installing the New Cartridge
Insert the new cartridge into the faucet body, ensuring it aligns properly with the faucet's handle shaft. The cartridge should fit snugly into the faucet, with the O-rings creating a tight seal.
For Moen 1186 cartridges, secure the new nut onto the cartridge, connecting it to the faucet housing. Tighten the nut using an adjustable wrench, applying steady pressure until the nut is secure but not overtightened. Be careful not to overtighten, as this can cause damage to the cartridge or faucet housing.
For Moen 1225 cartridges, reinsert the threaded fitting and secure it using a socket wrench. Tighten the fitting by turning it clockwise, applying steady pressure until the fitting is secure but not overtightened. As with the nut, be cautious not to overtighten the fitting.
Reassembling the Faucet
With the new cartridge installed, you can begin reassembling the faucet. Reinstalling the faucet components ensures smooth operation and restores your bathroom's functionality. Follow these steps to reassemble the faucet:
Reattach the faucet handles, ensuring they are properly aligned with the cartridge's handle shaft. For set-screw handles, replace the set screw and tighten it using a small flathead screwdriver. For from-the-back handles, replace the mounting screws and secure them using a screwdriver.
Reconnect the water supply to your faucet. Turn the shut-off valves counterclockwise to open the water supply, and restore the water pressure to your faucet. Turn on the faucet handles and check for leaks around the handles or base of the faucet. If there are no leaks, your Moen faucet cartridge replacement was a success!
Maintaining Your Moen Faucet Cartridge
Replacing your Moen faucet cartridge ensures smooth operation and leak-free performance. To maintain your faucet and prolong the life of the new cartridge, follow these tips:
- Regularly inspect your faucet for signs of wear or damage. Address any issues promptly to prevent further damage or leaks.
- Clean your faucet regularly to remove mineral deposits and build-up, which can affect performance and lead to leaks.
- Be gentle when turning the faucet handles to avoid damage to the cartridge or faucet housing.
- If you notice a decrease in water flow or temperature control, it may be time to replace the cartridge again. Regularly replacing the cartridge ensures optimal performance and prevents leaks.
In the event that you encounter difficulties during the replacement process, consult the Moen website or contact Moen's customer service for additional assistance. With proper care and maintenance, your Moen faucet will provide reliable, leak-free performance for years to come.
Embracing the DIY spirit, you've successfully conquered the art of replacing your Moen bath faucet cartridge. By following this step-by-step guide and maintaining your faucet, you'll enjoy a functional, leak-free bathroom that's the envy of your neighbors. Happy fixing!
Related Articles
Step-by-Step: Replace Moen Bath Faucet Cartridge
Is your Moen bath faucet cartridge acting up? Are you experiencing uneven water temperature, or perhaps it's completely stopped working? Not to worry...

Mastering Moen: Step-by-Step Shower Faucet Cartridge Replacement
Is your Moen shower faucet cartridge acting up, causing leaks or poor water flow? Don't let these issues dampen your bathroom experience. Replacing the...

Step-by-Step: How to Replace Cartridge in Moen Kitchen Faucet
From time to time, the water flow in your Moen kitchen faucet may slow down due to a clogged cartridge. This is a common issue that can be easily resolved by...
How to Replace a Moen Kitchen Faucet Cartridge: A Step-by-Step Guide
Having a leaky or malfunctioning faucet can be a sore spot for any homeowner. If you're dealing with a Moen kitchen faucet that's causing you grief, you might...

Mastering Moen: Step-by-Step Cartridge Replacement for Single Handle Kitchen Faucets
Expert tips on replacing the cartridge in your Moen single handle kitchen faucet are right at your fingertips. Follow this comprehensive guide, tailored for...
Step-by-Step: Change Moen Shower Faucet Cartridge
If your Moen shower faucet isn't working as it should, the culprit might be a faulty cartridge. Fortunately, replacing it is a common DIY task. So, let's guide...