Step-by-Step: How to Replace Wood Under Sink
If you're dealing with a sagging, damaged, or moldy sub-floor underneath your sink, it might be time for a replacement. This task might seem daunting, but with the right tools and steps, you can confidently handle this DIY project. Let's dive into a comprehensive guide on how to replace wood under sink, ensuring your home remains structurally sound and secure.
Before we begin, safety is paramount. Turn off your water supply using the valves under the sink or at the main water supply. Drain the pipelines by opening the faucet and flush the system to remove any remaining water. Always remember to wear gloves and goggles during this process to protect yourself from debris and sudden water sprays.
Assessing the Damage and Gathering Materials
Start by removing the cabinet doors and any paneling that could obstruct your work. Inspect the sub-floor under your sink for rot, sagging, or considerable damage. If the decay is extensive, you may need to replace the entire sub-floor, not just the affected part.

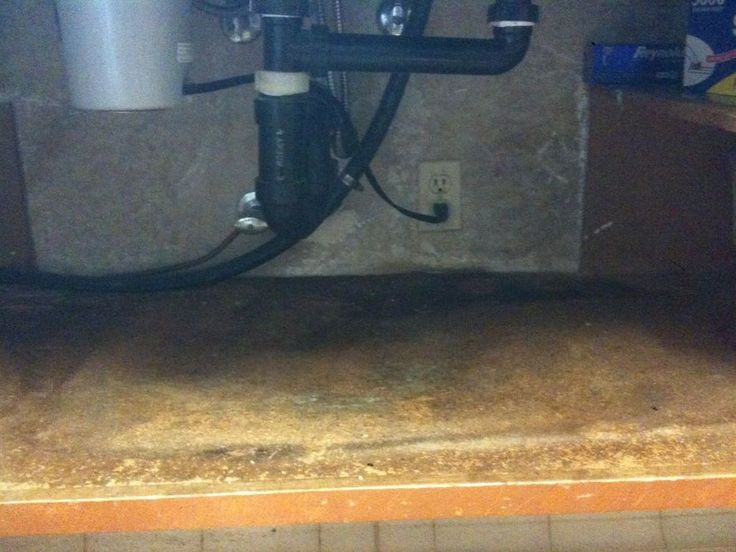

Once you've assessed the damage, gather your materials. You'll need new pressure-treated or composite wood (for better resistance to moisture), construction adhesive, screws, sandpaper, and wood filler. Also, ensure you have the necessary tools: a jigsaw, drill, screwdriver, utility knife, measuring tape, and a level.
Removing the Old Wood
Preparation
Use a utility knife to score along the seams of the old sub-floor. This will make it easier to break up and remove the old pieces. Then, use a pry bar or a flathead screwdriver to lift the edges and break the old sub-floor into manageable pieces.


After removing the old wood, you might encounter nails or screws. Use a claw hammer or an impact driver to remove any fasteners. Be cautious not to damage the surrounding area. If there's any remaining glue or adhesive, scrape it off with a putty knife.
Preparing the Area
Before installing the new sub-floor, ensure the area is clean and dry. If there's any moisture, use a dehumidifier or a fan to dry it out. Any remaining old sub-floor material should be thoroughly removed, including any nails or screws.
Smooth out any rough edges or surfaces with sandpaper. Use a level to ensure the area is even and flat. If there are any low spots, fill them with wood filler and sand it smooth once dry. The new sub-floor needs a solid, even surface to sit on.
Installing the New Wood Sub-Floor
Measure the area where you'll place the new sub-floor. Cut the new wood pieces to size using a jigsaw, ensuring they fit snugly and squarely. Apply construction adhesive along the ends, edges, and any seams where the new sub-floor will meet the existing one. This will help reinforce the joint and prevent water damage.
Start installing the new sub-floor from one corner, working your way across. Use a level to ensure each piece is even and aligned. Secure the new sub-floor with screws, using a drill with a countersink bit to ensure the screw heads are flush with the surface. Remember to predrill holes to prevent the wood from splitting.
Securing and Finishing
Once all new pieces are secured, check the entire area again with a level to ensure it's flat and even. Apply wood filler to any gaps or holes, and sand it smooth once dry. Wipe the area clean with a damp cloth, ensuring no dust remains.
Now, let the construction adhesive and wood filler dry completely before reinstalling the cabinet doors and any paneling. Turn the water supply back on and test your sink to ensure there are no leaks.
Preventive Maintenance
Regular Inspection
Regularly inspect the under-sink area for any signs of moisture or damage. Water leaks can cause serious damage to your home's structure, so it's crucial to catch any issues early.
Look for warping, swelling, or discoloration, which could indicate a water leak. If there's any mold or mildew, clean it promptly using a solution of bleach and water. Always maintain good ventilation under your sink to prevent moisture buildup.
Preventive Measures
Install a water leak detection system to monitor for any water leaks. These systems can automatically shut off your water supply when a leak is detected, preventing significant damage.
Also, ensure your plumbing is well-maintained. Regular check-ups can help prevent leaks and other issues. Keep the area under your sink clear of clutter, making it easier to detect any moisture or damage.
Seeing your replaced under-sink wood looking as good as new is a rewarding feeling. Regular maintenance and prompt action at signs of trouble will ensure your DIY replacement lasts for years. Who knows? You might find yourself tackling more home improvement projects with this newfound confidence!
Related Articles

Step-by-Step: Replace Shut Off Valve under Kitchen Sink
If your kitchen sink isn't functioning due to a faulty shutoff valve, it's essential to replace it promptly. This guide will walk you through the process...

How to Replace Wood on Trailer: Step-by-Step Guide
Is your trailer lacking that fresh, polished look it once had? Wooden trailers can take a beating over time, leading to rot, warp, and an overall worn-out...

"Step-by-Step: Replace Wood Stove Door Gasket"
Wood stove doors are prone to wear and tear, often resulting in a faulty gasket. A faulty gasket can lead to poor insulation, allowing heat to escape, and...

Step-by-Step: Replace a Car Visor in Under 10 Minutes
Regularly maintaining your vehicle involves a wide range of tasks, from checking fluid levels to replacing worn-out components like the car visor. Replacing a...

Step-by-Step Guide: Replacing a Faucet on a Pedestal Sink
Refreshing your bathroom's look doesn't always require a complete overhaul. A simple swap of the faucet can significantly spruce up your pedestal sink's...

Step-by-Step: How to Replace a Sink Flange
Is your kitchen sink leaking or not draining properly? The issue might be due to a worn-out or damaged sink flange, the part that connects your sink to the...