How to Replace a Moen Bathtub Faucet Cartridge
Tired of a leaky or non-functioning Moen bathtub faucet? Replacing the cartridge can often resolve these issues and revitalize your faucet's performance. This guide will walk you through the process with easy-to-follow steps, ensuring your project is completed safely and efficiently. Let's get started.
Before we dive into the process, ensure you have the following tools and materials ready: adjustable pliers, a flathead screwdriver, a Phillips screwdriver, a faucet cartridge removal tool (if available), and, of course, the replacement cartridge compatible with your Moen model.
Preparation and Draining the Pipes
Begin by turning off the water supply to your bathtub. The shut-off valves should be located behind the access panel near your bathtub. If there are no access panels, you may need to turn off the main water supply to your home.


Next, relieve the water pressure in the pipes by turning on the faucet and allowing any remaining water to drain. To prevent any water from hardening and causing leaks later, you can turn on the adjacent shower faucet to allow water to drain from the pipes.
Removing the Handle Assembly
Start by unscrewing and removing the handle. For Moen faucets, this typically involves unscrewing a setscrew located under the ring at the base of the handle using an Allen wrench. Once the setscrew is removed, carefully pull the handle towards you to release it from the faucet's stem.
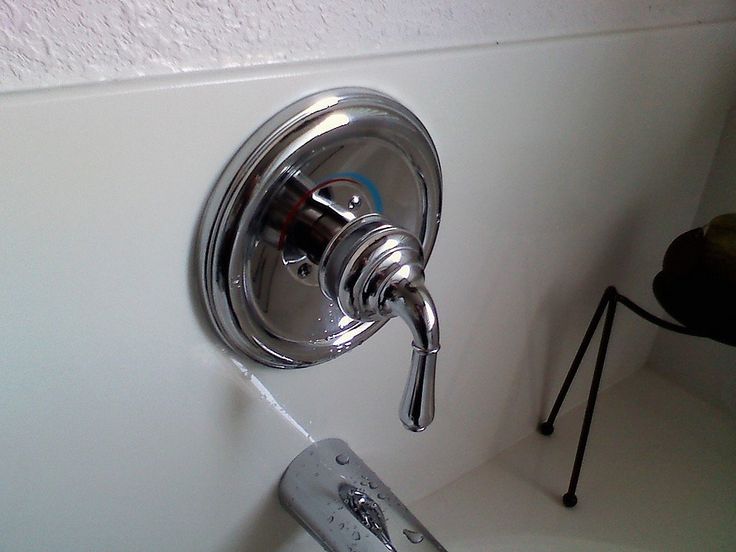

Remove the cap and escutcheon that covers the faucet's interior by prying them off gently with a flathead screwdriver or your fingers. You might need to use some force, but avoid damaging the surrounding area. Now, you should have access to the faucet's internal components.
Accessing and Removing the Cartridge
Using a Phillips screwdriver, remove the locking screw that secures the faucet's cartridge in place. If you have a faucet cartridge removal tool, insert it into the hole where the locking screw was located and gently pull it to remove the cartridge. If not, you can use adjustable pliers to carefully pull the cartridge out.
Before removing the cartridge, take note of its position within the faucet body. This will help you understand how to install the new cartridge correctly. Once the cartridge is out, unscrew and remove the chrome diverter if applicable, and discard the old O-rings as they will not be reused.
Installing the New Faucet Cartridge
Begin by recoating the new cartridge with plumber's grease, ensuring that the notches on the sides are fully coated. This helps to create a proper seal and allows the cartridge to move smoothly within the faucet body.
Position the replacement cartridge back into the faucet body, ensuring it matches the orientation of the old cartridge. Reinstall the chrome diverter and screw it into place, ensuring it is securely fastened.
Reinstalling the Internal Components
viously removed locking screw, ensure it is snug but not overly tight. Reassemble the internal components of the faucet in the reverse order of removal, first reinstalling the cam washer, then the handle, and finally the cap and escutcheon.
Test the faucet by turning the water supply back on and checking for leaks. If there are no leaks, congratulations! You have successfully replaced the cartridge in your Moen bathtub faucet. If there are leaks, double-check that all components were reinstalled correctly and the new cartridge was properly greased.
Final Checks and Maintenance
Allow the water to flow for a few minutes to ensure that air is fully expelled from the pipes. Check the faucet and pipes for any signs of leaks. If you follow these steps carefully, you should have a fully functional bathtub faucet that serves you well for years to come.
Regularly inspect your bathtub faucet for any signs of wear, and maintain it by keeping it clean and lubricating the cartridge with plumber's grease as needed. This will not only help prevent leaks but also extend the lifespan of your faucet. Happy DIYing!
Related Articles

Mastering Moen: Step-by-Step Shower Faucet Cartridge Replacement
Is your Moen shower faucet cartridge acting up, causing leaks or poor water flow? Don't let these issues dampen your bathroom experience. Replacing the...

Step-by-Step: Replace Pfister Bathtub Faucet Cartridge
Tired of your Pfister bathtub faucet's lackluster performance? Replace its cartridge to restore functionality and elegance. In this guide, we'll walk you...

Step-by-Step: How to Replace Cartridge in Moen Kitchen Faucet
From time to time, the water flow in your Moen kitchen faucet may slow down due to a clogged cartridge. This is a common issue that can be easily resolved by...

Step-by-Step: Replace Moen Bath Faucet Cartridge
Is your Moen bath faucet cartridge acting up? Are you experiencing uneven water temperature, or perhaps it's completely stopped working? Not to worry...
How to Replace a Moen Kitchen Faucet Cartridge: A Step-by-Step Guide
Having a leaky or malfunctioning faucet can be a sore spot for any homeowner. If you're dealing with a Moen kitchen faucet that's causing you grief, you might...

Update Moen Bathroom Faucet
Maintaining a well-functioning bathroom faucet is essential for your daily routine, and when issues arise, it's crucial to address them promptly. A common...