Mastering Watercolor: A Step-by-Step Guide to Painting Fur
Capturing the intricate beauty of fur in watercolor can be a challenging yet rewarding task. With the right techniques, you can bring depth, texture, and life to your paintings. Let's dive into the world of watercolor and explore how to paint fur with ease and finesse.
Watercolor, with its fluid and-transparent nature, might seem like an unlikely medium for painting fur. However, with patience and understanding of watercolor's unique properties, you can create stunning fur textures that evoke softness and movement.
Understanding Fur and Watercolor
Fur is complex, with variations in density, length, and direction. To translate this into watercolor, we'll need to work with layers, textures, and washes. Understanding how watercolor behaves is crucial. Thicker pigments remain on the surface, creating darker values and textures, while thinner washes allow the paper's color to show through, creating lighter tones.


Watercolor also behaves differently from acrylic or oil paints. It moves and shifts on the paper, creating natural gradients and blending effects. By employing this, we can create the illusion of soft, flowing fur.
The Right Materials for Painting Fur
Having the right materials can significantly enhance your watercolor fur painting experience. Opt for high-quality watercolor paints, as they offer vibrant colors and rich pigments. Look for professional grade brushes with soft, synthetic or synthetic blend bristles. These provide excellent color pick-up, lay down, and blending capabilities.
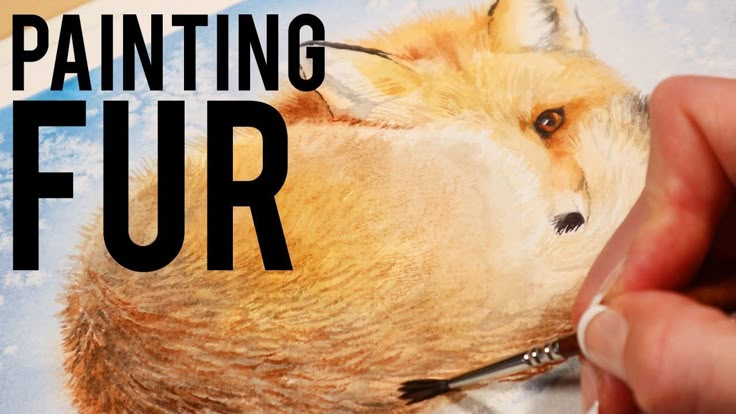

Consider using three brush sizes for versatility: a small round brush for details, a medium round brush for washes and medium details, and a large soft brush for washes and fading edges. Specialist brushes like fan brushes and liner brushes can also come in handy for creating different fur textures.
Preparation and Beginner Tips
Before you start, ensure your paper is stretched and secured to prevent buckling. Watercolor paper with a heavy weight (300gsm or more) works best. It can withstand multiple washes without buckling or piling.
For beginners, it's helpful to test colors and washes before applying them to your painting. Try out different colors and layering techniques on scrap paper to understand and predict their behavior.
Painting Fur: Techniques and Layering
The key to painting fur in watercolor lies in understanding how to create textured, layered washes. By layering colors and techniques, you can build up the illusion of depth and texture that's characteristic of fur.
Start with light washes of your base color, building up to darker values. Always work from lighter to darker to prevent muddy colors. Allow each layer to dry completely to preventahnishing, and control your colors better.
Dry-brush Technique
The dry-brush technique is an essential tool for creating the texture of fur. Load your brush with very little water and paint, then gently brush against the grain of the fur, lifting the brush periodically to remove excess paint. This helps to create edges and separation between fur strands.
For a smooth, continuous effect, vary the pressure and direction of your brush strokes. For a more broken, textured effect, use the tip of your brush for intermittent, sharp strokes.
Salting and Splattering Technique
To create highlights and the illusion of individual hairs, use the salting or splattering technique. Sprinkle a small pinch of salt onto a wet wash, allowing the salt to absorb the heavier pigments. Once dry, gently brush off the salt, revealing delicate, randomised highlights.
For a more dramatic effect, use a stiff brush to splatter diluted paint onto your fur washes. This creates a speckled look, mimicking the short, upright hairs common in many animals' fur.
가지 (Korean: fruits) with Different Color Combinations
The color of fur can vary dramatically, from soft beiges to dark greys, and vibrant jewel tones. Understanding color theory helps when selecting complementary or analogous color schemes for your fur paintings.
To create depth and variation, use different shades and tints of your chosen color. For example, a light beige could be layered with darker buffs, creamy whites, and chestnuts, depending on the desired effect.
Painting Dark Fur
Dark fur, like black, grey, or deep brown, can be challenging but rewarding to paint. Start with layers of dark greys using blues and purples as undertones. These create depth and a natural grey cast.
When adding highlights, use cooler, lighter greys and consider adding subtle reflections of the surroundings. This helps to integrate the animal into its environment and adds a touch of realism.
Painting Light or или (Russian: white) Fur
Light fur, such as whites, creams, and pale beiges, are deceptively challenging. To avoid muddy, lifeless tones, avoid using too many colors. Start with a warm, light grey and build up with sequential layers of white and pale colors.
For highlights, use a combination of white and a touch of the base color. This helps to maintain the overall color harmony and prevents the fur from looking flat or washed out.
Remember, every animal is unique. Don't be afraid to experiment with color and technique to capture the essence of your subject.
Watercolor fur painting is a journey of exploration and discovery. With practice and patience, you'll find that watercolor is a versatile medium that can capture the beauty and complexity of fur with stunning results. Happy painting!
Related Articles

Mastering Clouds: A Step-by-Step Guide to Watercolor Painting
The whimsical dance of clouds across the sky can be beautifully captured in watercolor, creating delicate, atmospheric landscapes. Painting clouds requires a...

Mastering Watercolor: Step-by-Step Guide to Painting Gorgeous Eyes
Capturing the vibrancy and detail of an eye in watercolor can be both challenging and rewarding. With the right techniques and practice, you can create...

Mastering Watercolor: Step-by-Step Guide to Painting Trees
Embarking on a creative journey with watercolors is an engaging and rewarding experience. Painting a tree with watercolors can seem daunting at first, with its...
Mastering Clouds: A Step-by-Step Guide to Painting Skies in Watercolor
The vast, open sky in all its glory is a captivating subject in watercolor painting. Its seemingly infinite expanse can represent a challenge, but with the...

Mastering Watercolor: A Step-by-Step Guide to Painting Grass
Discover the lush, vibrant world of watercolor painting with our step-by-step guide on how to capture the essence of grass in your artwork. Whether you're a...

Mastering Watercolor: A Step-by-Step Guide to Painting Pansies
Does a splash of color brighten your day? Then let's dive into the enchanting world of watercolors and learn how to paint pansies, those lovely little blooms...