Crafting a Paper Flag: A Step-by-Step Guide
Show off your patriotic spirit or personal pride with a handmade paper flag! Creating a paper flag is a fun and creative project that's perfect for kids and adults alike. Whether you're crafting a customary US flag for a school project, a national flag for an international event, or a custom design for your bedroom wall, we've got you covered with this comprehensive guide on how to make a paper flag.
Before you start, gather your materials: paper, scissors, glue, markers or paint, and a ruler. For more detailed designs, you might also need a pencil, compass, and straight edge. You'll also need a proud and patriotic spirit! Now, let's dive into the crafting process.
Choosing Your Paper and Size
Paper selection is crucial for the longevity and appearance of your flag. Heavyweight paper, cardstock, or construction paper work best. Choose red, white, and blue for a US flag, or use your country's flag colors if you're crafting another national flag.


Size matters! Decide if you want a small pocket flag, a medium-sized wall hanging, or a large floor-standing flag. Remember, larger flags require more paper and more effort, but they make a bigger statement!
Designing Your Flag
Most people are familiar with the US flag's 13 stripes and 50 stars, but other countries' flags can vary greatly. Research your flag's design if you're not sure. You might need to draw your design first, then transfer it onto the paper. For simple designs, sketch your layout right on the paper.
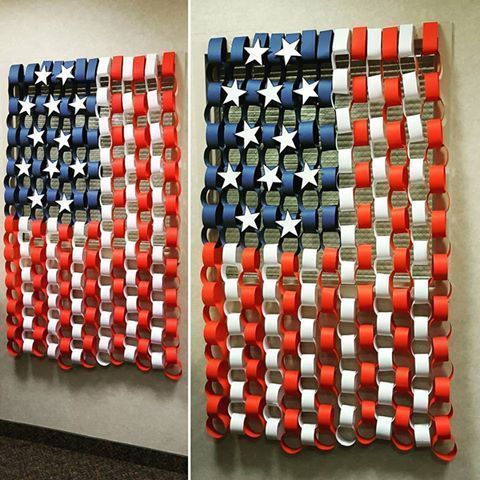

Consider using a lightbox or tracing paper for more intricate designs. Drawing lines lightly with a pencil works best, then go over them with markers or paint for a clean final product.
Striped Flags
Striped flags, like the US flag, are easier to design than those withtalks and emblems. Start with your thickest stripes at the top, then measure and draw your stripes below, tapering them slightly at the bottom for a traditional flag shape.
For precise stripes, use a fading tool or marker, drawing lines that gradually get closer together to mimic the tapering effect. Once you've drawn your stripes, fill them in with your desired colors.
Complex Flags
Flags with coats of arms, special symbols, or separate sections can be more challenging. Break your design into simple shapes or sections, then transfer those onto your paper. Use smaller paper pieces for detailed or specific parts, then glue them onto the main body of the flag.
You might need to use a mix of drawing, painting, or printing techniques to achieve your desired final look. Don't be afraid to get creative and experiment with different methods!
Cutting Your Flag
Once you've drawn your design, it's time to cut out your flag. Use sharp scissors and take your time for a clean edge. For very intricate or small details, consider using craft scissors or a craft knife.
Remember to cut out a pole pocket if your flag will be displaying vertically. Measure about 1 to 2 inches on the top of the flag, mark it, then cut a small slit for your flagpole to slide through.
Assembling Your Flag
Once your pieces are cut, it's time for assembly! Use a strong craft glue to attach any smaller parts or details. Allow the glue to dry completely before handling your flag, even if the bottle says it's instant-dry.
For many-layered flags, you might need to use a combination of drying time and light presses to ensure everything sticks properly. If your design includes cutouts, be careful not to let the glue seep through to the other side, causing it to stick where you don't want it to.
Stick or Fold Your Strips
For US and other striped flags, instead of cutting individual stripes, you can cut long strips of paper, fold them in half lengthwise, then glue them together. This technique creates a lamentation effect and gives your flag a more dynamic look.
Alternatively, you can cut each stripe individually and glue them together for a simpler, cleaner look. Either method works, so choose the one that best fits your vision and skill level.
Adding the Final Touches
Once your flag is fully assembled and dry, add any final touches. Paint or draw on any necessary details, include special wording or emblems, or attach a small velcro patch or pin if you plan to use your flag as a decorative accessory.
Don't forget to sign your masterpiece! Whether it's with a pen, marker, or paint, sign your name (or your family's name, if it's a group effort) on the bottom left corner to show off your artistic prowess.
Your handmade paper flag is now complete! Hang it with pride, give it as a gift, or exhibit it at your next patriotic event. And remember, the best part of crafting your own flag is that it's a unique, personalized statement that's all your own. Happy crafting!
Related Articles

Crafting the Perfect Paper Flag: A Step-by-Step Guide
The art of crafting your own custom flag, even in miniature form, is an innovative and rewarding endeavor. One of the most accessible mediums for such a...

"Crafting a British Flag in Minecraft: Step-by-Step Guide"
Displaying your national pride in the world of Minecraft is made possible by the game's extensive customization options. One of the most recognized symbols of...

Crafting an American Flag Banner in Minecraft: Step-by-Step Guide
If you're a Minecraft player eager to show your American pride within your gaming world, creating an American flag banner is a fun and engaging project. This...

Crafting Flag in Minecraft: A Step-by-Step Guide
Creating a flag in Minecraft is a fun way to express creativity and represent your own or your favorite nation. While Minecraft doesn't have a built-in flag...

"Crafting Minecraft's Moving Doors: A Step-by-Step Guide"
Embarking on the quest to create moving doors in Minecraft? You've come to the right place! This ultimate guide will walk you through the process, from...

"Crafting a Bolt-in Raft: A Step-by-Step Guide"
Embarking on a rafting adventure? Building your own raft, or a "bolt-in" raft as it's often called, is an exciting and rewarding DIY project that combines...