Step-by-Step Guide: How to Install a Skylight on Your Roof
Adding a skylight to your roof can transform your space, bringing natural light and a heightened sense of openness into your home. This guide will walk you through the process of installing a skylight, ensuring you're equipped with the knowledge and resources needed for a successful DIY project. Remember, safety is paramount when working on your roof, so ensure you have the necessary safety measures in place before you begin.
Before starting, it's crucial to understand your roof's structure and ensure that it can support the weight of a skylight. Consulting with a professional architect or builder can provide invaluable insight into your roof's suitability for a skylight installation.
Planning Your Skylight Installation
Once you've established that your roof is structurally sound, it's time to plan your skylight installation. Consider the size and type of skylight that would best suit your room and budget. Remember, bigger isn't always better. A well-proportioned skylight can provide ample natural light without compromising your room's aesthetics.


Skylights come in two main types: fixed and vented. Fixed skylights are ideal for providing consistent light without overwhelming heat, while vented skylights allow for natural airflow and ventilation. Additionally, skylights can be installed in various shapes, including circular, rectangular, and hexagonal.
Choosing the Right Location
Selecting the right location for your skylight is crucial. Consider the room's layout, the direction of the sun, and any nearby trees or buildings that might cast shadows. Ideally, position your skylight above a seat, bed, or work area where you'll appreciate the copias of natural light it provides.


Also, consider the roofline and rafters, as they'll determine where you can safely install the skylight. MARK your chosen location on the roof using chalk or a marker from inside the room. This will guide you when cutting the opening from above.
Safety First: Assemble Your Tools and Gear
Safety gear should be non-negotiable when working on your roof. Invest in a reliable safety harness, secure it to the roof or a nearby chimney or tree, and use it religiously throughout the installation process. Additionally, ensure you have the following tools ready:
- A skilled helper to assist you on the roof
- Roofing nails and a hammer
- A circular saw with a metal-cutting blade
- Framing lumber and galvanized flashing
- Shingles or tiles to match your roof
- Chalk line and tape measure
- Roofer's cement and a trowel
- Drip edge flashing and a saw
Installing the Skylight
With your location marked and tools assembled, it's time to install the skylight. The first step involves cutting an opening in your roof that's slightly larger than the skylight's frame. This step requires careful precision, so take your time and follow these instructions closely.
Using your circular saw, carefully cut along the chalk lines, ensuring the opening is large enough to accommodate the skylight frame. Reinforce the cut edges with 2x4 lumber, securing them in place using roofing nails. Now, it's time to install the skylight itself. Follow the manufacturer's instructions for assembly, ensuring you align the skylight's sides with the rafters for added stability.
Securing the Skylight Frame
Secure the skylight frame to the roof's rafters using roofing nails. The exact method will depend on your skylight's design, but typically, you'll want to attach the frame using nails every 6 to 8 inches along the top and every 4 inches along the sides. Ensure the nails are long enough to penetrate at least 3/4 inch into the rafters.
Once the frame is secured, you can now attach the glass or acrylic dome. Again, follow the manufacturer's instructions, ensuring the dome is secured properly to prevent water leaks. Finally, apply a layer of roofer's cement around the top of the frame to provide additional waterproofing.
Securing the Flashing and Finishing the Installation
Apply drip edge flashing along the bottom of the skylight, securing it in place with roofing nails. This flashing helps to direct water away from the skylight and prevents leaks. Next, install the remaining shingles or tiles, ensuring they fit snugly around the skylight frame. Apply a final layer of roofer's cement around the perimeter of the skylight for added protection against water damage.
With your skylight now installed, you can enjoy the enhanced natural light and openness it brings to your living space. Regularly inspect your skylight for signs of leakage or damage, and maintain it according to the manufacturer's guidelines to ensure its longevity and performance.
Congratulations on successfully installing a skylight in your home! Transforming your space with natural light is a rewarding experience, and one that adds value and beauty to your home. As a final thought, consider how you can continue to enhance your home's natural light with additional lighting features, such as solar-powered lights or smart lightbulbs. Happy lighting!
Related Articles

How to Install Thule Roof Box: Step-by-Step Guide
Streamlining your journey, transporting more in your vehicle just got easier with Thule's roof boxes. They offer generous cargo space, aerodynamic design, and...

"Build a Roof Over Your Camper Today: Step-by-Step Guide"
Embarking on a camper adventure soon? One critical aspect to ensure a comfortable and safe journey is constructing a sturdy, weather-resistant roof. Whether...
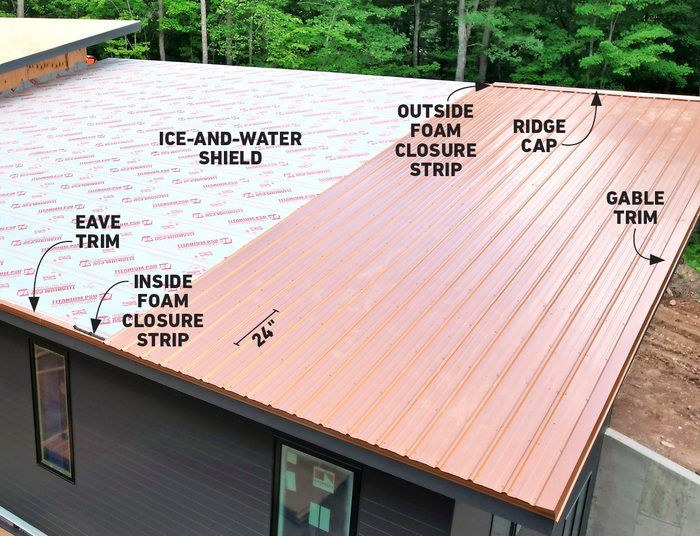
How to Install Metal Roofing on Flat Roof: Step-by-Step Guide
Transitioning your flat roof to metal can significantly boost durability and longevity, but the process demands careful planning and expert execution. This...

"Mastering Thule Roof Rack Installation: Step-by-Step Guide"
Installing a Thule roof rack is an excellent way to expand your vehicle's cargo-carrying capacity, making it perfect for road trips, moving, or hauling...

Mastering Minecraft: A Step-by-Step Guide to Building Your Dream Roof
Embarking on the fascinating journey of building a roof in the pixelated world of Minecraft can seem like a daunting task, but with the right tools, materials...

Mastering Roof Insulation: A Step-by-Step Installation Guide
Embarking on a roof insulation project? You're on the right track to a more energy-efficient and cozy home. Installing insulation in your roof is a rewardingly...