How to Install Metal Deck Railing
Metal deck railing systems offer unparalleled strength, durability, and aesthetic appeal for both residential and commercial spaces. Whether you're enhancing the safety of a balcony, creating a stylish deck enclosure, or aiming to meet building codes, installing metal railings is a practical and visually appealing solution. This comprehensive guide will walk you through the process, ensuring you understand each step for a successful and safe installation.
Before diving into the installation process, it's crucial to understand the different metal railing types and their applications. Stainless steel and aluminum are popular choices due to their corrosion resistance and low maintenance. Stainless is ideal for coastal or humid environments, while aluminum is lighter and often more affordable. Ensure you select a system that complies with local building codes and suits your needs.
Preparation and Planning
The success of your metal railing installation depends heavily on thorough preparation and planning. Start by measuring the area where the railing will be installed. Accurate measurements are vital for ordering the right amount of materials and ensuring a seamless fit.


Gather necessary tools, including a tape measure, level, saw (hand saw, jigsaw, or circular saw depending on the material), drill, screws, and any hardware specific to your railing system. Additionally, ensure you have safety gear like work gloves and eye protection.
Understanding the Railing Kit
Most metal railing systems come as a kit, complete with all necessary components. Familiarize yourself with the kit's contents, which typically include posts, railing sections, mountings, screws, and sometimes tutorials or diagrams. If you have any doubts, consult the manufacturer's guidelines.


Some kits may require powder coating or finishing. If so, prepare the metal sections according to the manufacturer's recommendations and allow sufficient drying time before installation.
Acquiring Permits and Checking Codes
Before you begin work, verify if you need a permit for your installation. Local building departments can provide information on permit requirements and help ensure your project adheres to local building codes regarding railing height, spacing, and material.
Always prioritize safety. Common building codes often mandate railings to be at least 42 inches high with balusters no more than 4 inches apart to prevent small children from slipping through.
Installing Metal Deck Railing
Once you've prepared and planned, you're ready to begin the installation process. Always follow the manufacturer's instructions for the most accurate advice tailored to your specific railing system.
This section provides a general overview of the installation process, focusing on staircase and balcony railing installation. The process may vary slightly depending on your railing type and intended use.
Installing Posts
The first step in installing metal deck railing is securing the posts. Mark and measure the location of each post, ensuring they are level and evenly spaced. For staircases, place posts at the top and bottom of each flight, as well as at turn landings. For balconies, posts should be placed at corners and along the perimeter.
Drill pilot holes into your surface, then secure the posts using the provided hardware or masonry anchors if installing into masonry surfaces. Ensure posts are plumb (vertical) and level using a level tool. Tighten securely but avoid overtightening, which could damage the post.
Installing Railing Sections
With posts securely in place, it's time to install the railing sections. Assuming you've chosen a modular system, these sections should simply telescope into the posts. Ensure they are fully seated and level. If your system requires additional hardware for assembling sections, follow the manufacturer's instructions carefully.
If your railing kit includes a top rail, install it now, securing it flush with the top of the posts. Some systems may require additional mountings or brackets at the midpoint of each section for added stability.
Adding Balusters
Adding balusters provides safety and visual appeal. Again, ensure you comply with relevant building codes regarding baluster spacing and height. For most systems, balusters simply slide through corresponding holes in the top and bottom rails, before being secured with screws or lock-nuts.
As you install balusters, ensure they are evenly spaced and level. By keeping track of your baluster count, you can ensure an even distribution across your railing span. Once complete, double-check that your railing meets all safety requirements and local building codes.
Maintenance and Care
Regular maintenance will ensure your metal railing system maintains its durability, functionality, and appearance. Inspect your railing periodically for any damage or signs of wear, such as loose screws or balusters. Tighten any loose hardware and address any issues promptly.
While metal railings are known for their low maintenance,omnia a regular cleanse will help maintain their aesthetics. Use a mild soap and water solution, or a specialized cleaner designed for your specific metal. Avoid harsh chemicals, abrasive materials, or high-pressure washing to prevent damage.
Investing in high-quality metal railings and performing regular inspections can extend their longevity, ensuring they continue to serve their functional and aesthetic purposes for many years. Happy installing!
Related Articles

Easy Steps: Installing Vinyl Railing on Your Deck
Embracing the warmth and ambiance of your deck just got better with vinyl railing. Durable, low-maintenance, and aesthetically pleasing, vinyl is a top choice...
Step-by-Step Guide: How to Install Vinyl Deck Railing
You've decided to transform your outdoor space and opted for vinyl decking, renowned for its durability, low maintenance, and aesthetic appeal. However, to...

Mastering TimberTech Deck Installation: Step-by-Step Guide
Embarking on a home improvement project can be an exciting and rewarding experience. If you're planning to upgrade your outdoor space, installing a TimberTech...

"How To Install Your Deck: A Step-By-Step Guide"
Adding a deck to your home is an excellent way to enhance your outdoor living space. It provides an inviting area for relaxation, entertaining, and even adding...

How to Install a Metal Ceiling in a Pole Barn
Transforming your pole barn into a stylish, functional space often involves más than just wall finishing. If you're looking to elevate your barn's interior...
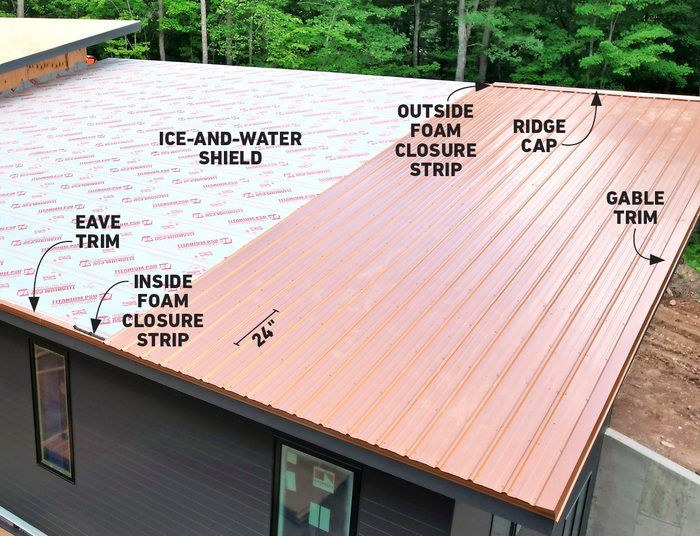
How to Install Metal Roofing on Flat Roof: Step-by-Step Guide
Transitioning your flat roof to metal can significantly boost durability and longevity, but the process demands careful planning and expert execution. This...