How to Install Apple TV 4K: Step-by-Step Guide
Are you eager to elevate your home entertainment experience with the stunning visuals of the Apple TV 4K? Unveiling a world of 4K, HDR, and Dolby Atmos, this powerhouse device is ready to enchance your movie nights and gaming sessions. Let's guide you through the seamless process of installing your new Apple TV 4K, ensuring you're up and running in no time.
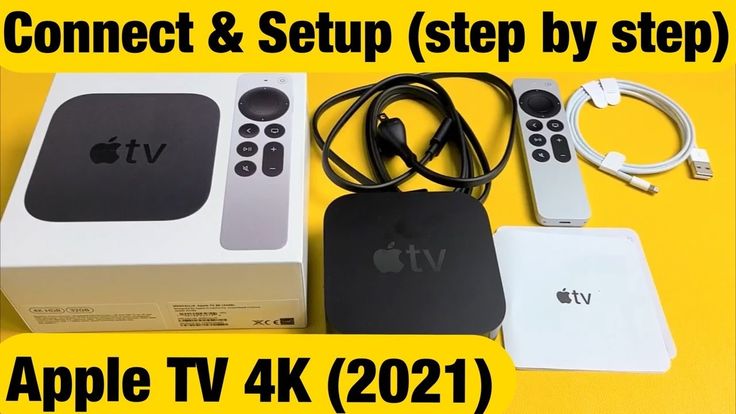
Before we dive into the installation process, let's ensure you have everything you need. Alongside your shiny new Apple TV 4K, you should have an HDMI cable (preferably HDMI 2.0 or higher for 4K content), a power adapter, and an internet connection. If you're upgrading from a previous Apple TV, you may already have these essentials on hand.
Setting Up Your Apple TV 4K
With your preparation complete, let's begin the connection process. The Apple TV 4K connects to your TV via an HDMI cable, with the other end plugging into your TV's HDMI port. To ensure optimal performance, connect your Apple TV 4K directly to your TV, rather than through a receiver or soundbar.


Once connected via HDMI, it's time to power up your Apple TV 4K. Plug in the power adapter, and with a little patience, you'll see the Apple logo on your TV screen, signifying the initial boot-up process.
Connecting to the Internet
For seamless connectivity, ensure your Wi-Fi network is on the 5GHz band for optimal performance. If your Apple TV 4K isn't detecting this network, try moving the device closer to your router or consider purchasing a Wi-Fi range extender to boost your signal.
Signing In to Your Account
With your Apple TV 4K connected to the internet, it's time to sign in to your Apple ID. This account will enable you to access your purchased content, use iCloud services, and manage your device through the Apple TV app on your iPhone, iPad, or Apple Mac.
If you're not yet an Apple user, fear not! You can create a new Apple ID right on your TV screen, or visit the Apple website for a more detailed walkthrough. With your Apple ID signed in, you're one step closer to enjoying your new Apple TV 4K.
Configuring Your Apple TV 4K Settings
Now that your Apple TV 4K is connected to the internet and your Apple ID, it's time to dive into the settings to optimize your viewing experience. From display and audio settings to configuration of your content preferences, we've outlined the top settings to fine-tune for your needs.
To access the settings, navigate to the 'Settings' icon on your home screen, then select the gear icon. From here, you'll be able to adjust settings like language, accessibility features, and more.
Display and TV Providers
Begin your configuration journey in the 'Video and Audio' section. Here, you can set your preferred display format (4K or standard), and enable or disable features like match content frame rate and motion smoothing. Additionally, if your Apple TV 4K is connected to a cable box or satellite receiver, you can input the content provider's details to watch live TV right from your Apple TV interface.
For optimal visual quality, ensure your TV's HDMI settings are set to pass through 4K content. Consult your TV's user manual if you're unsure of these settings.
Apps and Services
Apple TV 4K offers a plethora of entertainment apps, from subscription-based services like Netflix and Disney+ to free, ad-supported streaming platforms. Browse the App Store to discover your favorite content providers, then download and sign in to your accounts to start streaming in style.
To make navigation even more intuitive, create separate user profiles for each family member. This ensures everyone's apps and settings remain tailored to their preferences, with content suggestions based on individual viewing habits.
Congratulations! You've successfully installed and configured your new Apple TV 4K. Embrace the immersive world of 4K entertainment, and enjoy those blockbuster movies, groundbreaking Apple Originals, and gaming experiences like never before. Don't hesitate to explore further features, such as screen mirroring, AirPlay, and the Apple Fitness+ service, to get the most out of your new device.

Related Articles

Connect Beats to Apple Watch: Step-by-Step Guide
In today's connected world, we often juggle multiple devices to streamline our tasks and activities. Among these, Apple Watch and Beats by Dre headphones have...

Mastering Blender: Step-by-Step Guide to Installing Add-Ons
Blender, a free and open-source 3D computer graphics software toolset, has a vast array of community-created add-ons that can enhance your 3D modeling...

How To Install Ducts: Step-by-Step Guide
Installing ducts might seem like a daunting task, but with the right tools, materials, and guidance, it can be a DIY project well within your reach. This...

Mastering GodMode9: A Step-by-Step Installation Guide
Embarking on your journey to master GodMode9, a powerful tool for modding and exploring the inner workings of Nintendo Switch games, begins with a seamless...

Lower Apple Watch Brightness: Easy Step-by-Step Guide
Ever felt your Apple Watch is too bright, especially in dimly lit environments? Adjusting the brightness can be a game-changer for your eyes and battery life...

Creating Apple ID in Japan: A Step-by-Step Guide
Creating an Apple ID for use in Japan involves a few simple steps. This unique account gives you access to various Apple services, from the App Store to...