"How to Install a Roof Swamp Cooler: A Step-by-Step Guide"
Looking for an affordable and eco-friendly way to keep your home cool during those scorching summer months? Installing a roof-mounted swamp cooler, also known as an evaporative cooler, might be just the solution you've been hunting for. Not only do these units save money on your energy bills, but they also help maintain humidity levels, promoting a healthier indoor environment. Let's dive into the step-by-step process of how to install a roof swamp cooler with this comprehensive guide.
Before we get started, it's crucial to ensure that evaporative cooling is an appropriate choice for your climate. These coolers work best in arid environments with low humidity. If you're unsure, consult your local HVAC professional or check humidity levels in your area. Also, make sure you're familiar with essential safety precautions during the installation process.
Gather Your Tools and Materials
Before heading up to your roof, ensure you have all the necessary tools and materials on hand. A typical roof swamp cooler installation requires the following:


Tools: Ladder, drill, screwdriver, tape measure, level, caulk gun, trowel, and safety equipment (safety glasses, work gloves, hard hat, and fall protection).
Selecting the Right Cooler
Materials: Roof-mounted swamp cooler, roof jack, flashing kit, screws, caulk, screws, and gaskets. The first step in this process is choosing the right swamp cooler for your home. Factors like room size, airflow needs, and your roof's configuration should all influence your decision. Always consult the manufacturer's guidelines for the optimal placement and installation of the unit.


Preparing Your Roof
Prepare your roof for the installation by ensuring it's clean, dry, and free of debris. Measure and mark the location for your swamp cooler, ideally at the highest point on your roof for optimal airflow. It's crucial to position the cooler near an exterior wall to attach it to the ductwork inside your home.
Install the Roof Jack
With your materials and tools gathered, it's time to begin the installation. The primary structure of a roof-mounted swamp cooler is the roof jack, which anchors the cooler to your roof and provides a channel for airflow. Follow these steps to install the roof jack:
Measuring and Marking
Use a tape measure to mark the center point of your cooler's location on the roof. This mark indicates where you'll install the roof jack.
Cutting the Hole
Carefully cut a hole in your roof at the marked location, cutting an opening that's slightly smaller than the roof jack's base. This ensures a snug fit and promotes proper air circulation. Use a utility knife or a reciprocating saw to cut through the roofing material.
Install the Roof-Mounted Swamp Cooler
Once you've successfully installed the roof jack, it's time to attach your swamp cooler. Follow these steps for a secure and efficient installation:
Mounting the Cooler
Position the swamp cooler onto the roof jack, aligning the baffle with the opening in your roof. Secure the cooler to the jack using screws, ensuring it's level and firmly attached to the roof surface.
Ductwork Connection
Connect the ductwork from your swamp cooler to the intake vent inside your home. Ensure the connection is airtight by applying sealant and using appropriate fasteners. Consult your cooler's manufacturer guidelines for specific ductwork requirements.
Seal and Insulate
Once you've securely mounted your swamp cooler and connected the ductwork, it's essential to seal and insulate the installation to prevent air leaks and maintain energy efficiency. Follow these steps to ensure proper insulation:
Applying Flashing
Use the flashing kit provided with your cooler to seal the opening around the cooler's base. Apply the flashing material, working your way up from the bottom to ensure proper sealing and waterproofing.
Adding Insulation
Insulate the area around the cooler's base and the ductwork connection using foam sealant or expanding foam insulation. This additional layer of insulation helps maintain energy efficiency and prevents condensation buildup.
Congratulations! You've successfully installed a roof-mounted swamp cooler, ready to provide efficient and eco-friendly cooling to your home. As a final touch, seasonally inspect your cooler for proper function and maintenance, including clean filters and a well-maintained pump. Monitor your unit's performance, and don't hesitate to call a professional if you notice any issues or decreased efficiency. Enjoy the cool, refreshing air that your new swamp cooler provides, knowing that you've made an environmentally-friendly investment in your home's comfort.
Related Articles
Install Swamp Cooler on Roof: A Step-by-Step Guide
Looking for a cost-effective way to cool your home during the summer months? A swamp cooler, also known as an evaporative cooler, might be just the solution...

Mastering Wraith Prism Cooler Installation: A Step-by-Step Guide
Are you in the market for an efficient cooling solution for your PC? The Wraith Prism cooler, with its sleek design and impressive performance, might just be...

How to Install Thule Roof Box: Step-by-Step Guide
Streamlining your journey, transporting more in your vehicle just got easier with Thule's roof boxes. They offer generous cargo space, aerodynamic design, and...
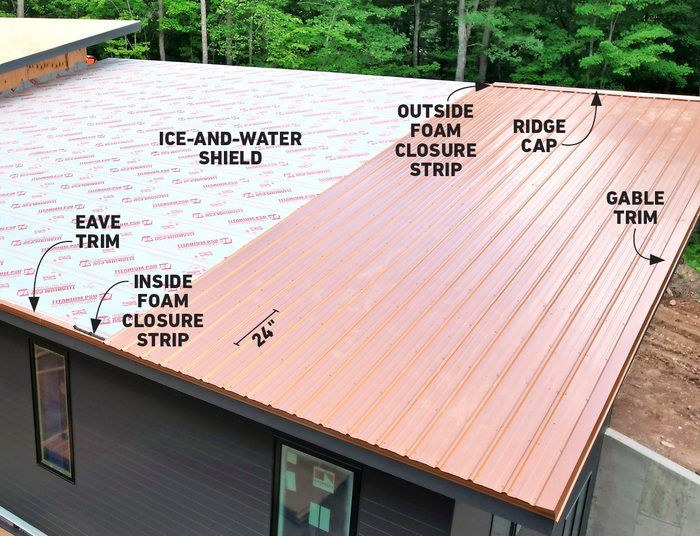
How to Install Metal Roofing on Flat Roof: Step-by-Step Guide
Transitioning your flat roof to metal can significantly boost durability and longevity, but the process demands careful planning and expert execution. This...

"Mastering Thule Roof Rack Installation: Step-by-Step Guide"
Installing a Thule roof rack is an excellent way to expand your vehicle's cargo-carrying capacity, making it perfect for road trips, moving, or hauling...

Step-by-Step Guide: Installing the AMD Wraith Cooler
Ever felt the heat of your AMD processor rising while gaming or running resource-intensive applications? Ensuring adequate cooling is paramount to prevent...