How to Create an Address Book in Word
Keeping track of important contacts is a necessity in today's digital age. While contact management apps are popular, Microsoft Word also provides a simple and efficient way to create and manage an address book. Let's explore how to create an address book in Word, ensuring you always have your essential contacts at your fingertips.
Word offers a convenient feature called "Content Control" that allows you to create and manage an address book within the application. This feature helps maintain a structured format, making it easy to add, edit, or delete entries as needed. Before we dive into the steps, ensure you have Microsoft Word installed on your device.
Setting Up the Address Book
To create an address book in Word, you'll first need to set up the document structure. Follow these steps to create a formatted address book:


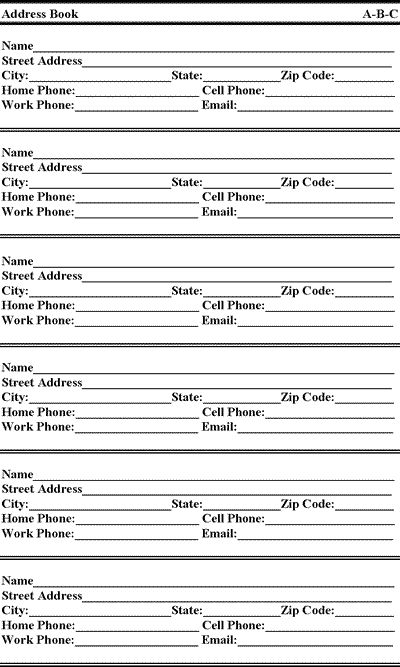
1. Open Microsoft Word and create a new document.
2. Click on the "Developer" tab in the ribbon (ensure it's enabled in Word Options). Then, click on "Design Mode" in the "Content Controls" group.


Creating Contact Fields
Now that you're in Design Mode, you can create fields for each contact's information:
1. Click on the dropdown arrow in the "Content Control" group, then select "Rich Text Content Control" (or " Plain Text Content Control" for simpler text entries).
2. Click and drag in the document to draw a field for the contact's name, title, company, address, city, state, zip code, phone number, and email address.
3. Label each field appropriately by right-clicking on the field and selecting "Label" from the context menu. For example, name the first field "Contact Name".
Creating the Contact Entries
After setting up the fields, you're ready to add, edit, and delete contact entries:
1. Click outside the fields to exit Design Mode. Now, you can type or copy-paste contact information into the respective fields.
2. To add a new contact, click below the last entry and press "Enter" to insert a new row. Repeat the process to add more contacts.
3. To delete a contact, simply highlight and delete the entire row. Word will automatically realign the remaining contacts.
Formatting and Customizing the Address Book
Word allows you to format and customize your address book for better readability and organization.
1. Select the entire table (Ctrl + A) and apply desired formatting, such as adding borders, changing font sizes, or merging cells.
2. To add or remove fields, simply click and drag in the table header or right-click the table and select "Properties" to customize the field names.
Sorting and Filtering Contacts
Word also offers sorting and filtering options to help manage your address book:
1. To sort contacts, select the header row, then click on "Sort" in the "Home" tab under "Sort & Filter". Choose the column to sort by and the desired order (Ascending or Descending).
2. To filter contacts, click on the filter dropdown arrow in the header row, then select the criteria for filtering.
Printing or Exporting the Address Book
Once your address book is complete, you can print or export it for easy reference:
1. To print, go to "File" > "Print", then select your printer settings and click "Print".
2. To export, go to "File" > "Save As", choose the desired file format (e.g., PDF or XPS), select the destination folder, and click "Save".
And there you have it! You've successfully created a comprehensive address book in Microsoft Word. Keep it updated and easily accessible for seamless communication with your network. Happy connecting!
Related Articles

How to Create Full Color Bleed Children's Books in Word for KDP: A Step-by-Step Guide
Are you an author looking to create a vibrant, full-color children's book for Kindle Direct Publishing (KDP)? Look no further! In this comprehensive guide...

"How to Create Folded Book Art"
COVID-19 has led to a surge in DIY activities, with many turning to crafts like folded book art for stress relief and creative expression. This art form, also...

How to Build a Mailing List in Word: A Step-by-Step Guide
Creating a mailing list directly within Microsoft Word might seem straightforward, but it's essential to understand that Word isn't designed to handle mailing...

How to Create an Outlook Email Address
Are you tired of accepting generic email addresses for your professional correspondences? Want an address that reflects your brand and business? Getting an...

How to Create an Accordion Book: Step-By-Step Guide
Nestled within the diverse realm of artistic craftsmanship lies the rewarding endeavor of creating an accordion book, a work that deftly combines functionality...

Create Stunning Word Cover Pages: A Step-by-Step Guide
Creating an impactful cover page is the first step in making a strong impression with your document. Microsoft Word offers a variety of user-friendly tools to...