How to Capture an Image on a PC
Capturing images on your PC has never been simpler, thanks to the built-in features and tools available. Whether you're snapping a quick screenshot or capturing a series of images for a project, this comprehensive guide will walk you through the process, ensuring you get the perfect shot every time.
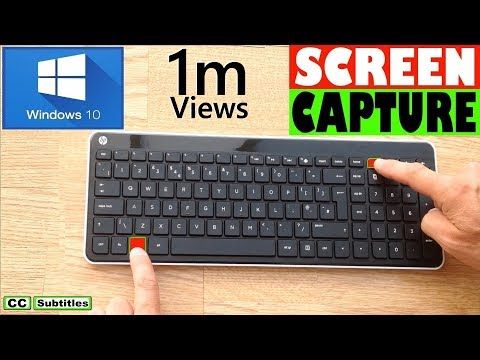
Before we dive into the details, let's familiarize ourselves with the basic keyboard shortcuts that make image capturing a breeze on your PC. The most commonly used shortcut is PrtScn or Print Screen key, located at the top-right corner of your keyboard. This key is instrumental in capturing the entire screen. Now that we've covered the basics, let's explore the detailed process.
Using Built-in Tools
The Windows operating system comes equipped with a suite of built-in tools for capturing images, making it a convenient choice for most users. We'll delve into the two primary methods: using the Snipping Tool and the more recent Snip & Sketch tool.


Please note that the Snipping Tool is available in older versions of Windows, while Snip & Sketch is included in Windows 10 and later versions.
Snipping Tool
The Snipping Tool is a versatile tool that allows you to capture any part of your screen. To use it, press Win + Shift + S, and your screen will dim. Click and drag your cursor to select the area you want to capture. Once you've made your selection, you can annotate, highlight, or save the image.

To access the Snipping Tool from the Start menu, type Snipping in the search bar, and click on the Snipping Tool icon. The process remains the same, but with this method, you can also set delay options to capture pop-up menus or. This is particularly useful when you need to capture menu drops or other time-sensitive elements.
Snip & Sketch
Snip & Sketch is a streamlined tool that builds upon the Snipping Tool's functionality and offers additional features. To access it, press Win + Shift + S or click on the notification icon in the bottom-right corner of your screen (next to the date and time).
Once open, you can choose from four types of snips: rectangular, free-form, window, and full-screen. After selecting the desired snip type, click and drag your cursor to capture the chosen area. Snip & Sketch will immediately open the captured image in the app, allowing you to annotate, highlight, or edit using an intuitive toolbar.
Capturing Screenshots with Ease
Sometimes, you might need to capture a screenshot quickly, without the need for additional tools or editing. Windows offers a simple and efficient way to do this using the Print Screen and Alt + PrtScn keyboard shortcuts.
To capture the entire screen, simply press the PrtScn or Print Screen key, and the image will be copied to your clipboard. You can then paste the image into any image editing software or document. If you want to capture only the active window, press Alt + PrtScn instead.
Using a Graphics Editor
For more advanced editing or to create screenshots with annotations directly in the image, you can use a graphics editor like Paint or a third-party application like Microsoft Paint 3D. Here's how to use Paint to capture a screenshot:
1. Open Paint by searching for it in the Start menu or by pressing Win + R, typing mspaint, and pressing Enter. 2. Press Alt + PrtScn to capture the active window. 3. You'll see the captured image appear in the Paint workspace, ready for editing. To save the image, click on the File menu and select Save as. Choose a location and file format before clicking Save.
Using Third-party Applications
While the built-in tools offer comprehensive image capturing capabilities, third-party applications can provide additional features and greater flexibility. Popular tools like Greenshot, ShareX, and Lightshot offer advanced features such as:
- Image editing and annotation tools
- Customizable hotkeys and capture modes
- Direct upload options for sharing images online
- Automatic image cataloging and organization
Explore these tools to find the one that best suits your needs and elevates your image capturing experience.
Now that you've mastered the art of capturing images on your PC, you're ready to snap, edit, and share with confidence. Whether you're creating tutorials, preserving memorable moments, or simply capturing important information, the tools and techniques discussed in this guide will ensure you have the perfect shot every time. Happy capturing!
Related Articles

Mastering Image Duplication: How-to in Photoshop
Duplicating images in Photoshop is a common task when you need to use the same element multiple times in your design. Instead of copying and pasting, which can...

Easily Flip Images in Adobe Illustrator
In the ever-evolving world of graphic design, Adobe Illustrator has become a staple tool for professionals and enthusiasts alike. One of the many operations...

Mastering Image Outlines: A Step-by-Step Cricut Design Space Tutorial
Looking to enhance your Cricut projects with Outline Image features? You've come to the right place. Outlining your images not only adds professionalism but...

Mastering Image Tints: Photoshop Step-by-Step
Imbuing images with tones and hues is an essential skill in photo editing, allowing you to set the right mood and atmosphere. One of the most powerful tools...

Mastering Moto: Step-by-Step Guide to Capture Screenshots
If you're a proud owner of a Motorola smartphone, you might be wondering how to capture a screenshot on your device. Taking screenshots can be incredibly...

Mastering Octopus Capture: Expert Techniques
Diving into the depths of the ocean to catch an elusive octopus is a task that combines adventure, patience, and a deep understanding of these intelligent...